So after a lot of hard work, I now have my B.S. in Human Resource Management. Graduation was yesterday, and I was glad to have Tony, Tristan, my sister Kaitlynn and my cousin Chelsey there to cheer me on.
My big mistake, however, was my choice in shoes. I wore these ridiculously cute gladiator heels that Tony got me the summer before I ran the half marathon, and they tore my feet UP. Ugh. But at least I looked great getting my degree!
 |
| Tony, Tristan and I right before I walked :) |
So I've been up to my old tricks when it comes to nail art lately and I decided I'd do a mini tutorial on my latest creation. Until now I've copied other tutorials and did simple layering but as of late I've been getting creative. My last few looks:

Since i started getting interested in nail art and really collecting nail polish shades, I've mostly stuck to single shades, layering sheers, and copyong tutorials. As of late I've been playing with more gradiants, 3D nail art, and coming up with my own looks and designs.
So without further adieu, my latest nail adventure...step by step.
Since summer started I've been wearing more bright colors.
Normally, I'd use bright shades on my nails too, but this time I wanted to do something in understated colors and more elaborate textures. So I came up with "decadent pearls".
First things first--nail care. I prefer to shape my nails with a file rather than cutting because I think it helps them stay stronger. Once I'm done with that, I use the glass nail file (from Old Navy) to fine touch the ends and make them smooth.
Next, I use a cuticle oil pen on my cuticles and over the whole nail for nourishment. Then I push my nails back with that little pink thing (the technical term is lost on me right now).
I started with a base coat I got from Sally's Beauty Supply. Always use base. I don't really know why, but I do know it just seems to work out better.
Next I used straight white polish. I know a lot of people go for white in the summer and it looks like white out on their nails, but trust me, I'm not done. FYI, if your going to do white, do it right: choose a shade that has a hint of another color. Sally Hansen Complete Manicure has a great selection. Use two coats.
Next is silver. Pour a small amount of polish onto some paper. Using a makeup sponge, dab a corner into the plush and then onto your nail. You want the polish to fade out near the cuticle, so the bottom of the nail is almost all white, and the tips are almost all silver.
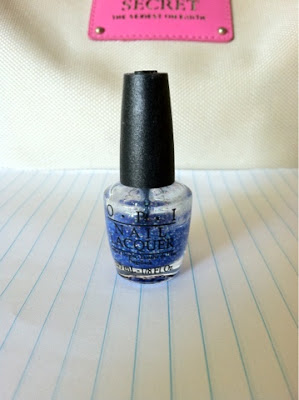
I thought that didn't have enough dimension, so I added TGIF from the Katy perry collection for OPI on the silver ONLY.
 |
| gets a lot of use! |
Then some clear coat..
And finally, the fun part. I ordered these nail art pearls from amazon.com
And picked up some gems from Wal-mart.
Using punk nail glue and tweezers, I basically just got creative. Here's my thumb...
And all the rest of them!
Have fun trying it!


No comments:
Post a Comment